While I was studying the small village of Ronda to broaden my Visual Library (what is Visual Library and why it is so important), I made a tutorial explaining how I would paint rocks digitally in Photoshop.
Something I miss in tutorials is the explanation why or how something happens. In this tutorial I want to stress the importance of first understanding and studying the object. The more you know about the subject, the easier the painting of that object will be afterwards.
Assemble the troops! Ahum,… references…
That’s the first step. Investigate and read about the subject while gathering references. Analyse.
Googling rocks will learn us that we can define multiple types and that they are not the same at all. In our reference we clearly define horizontal lines, an aspect that’s called bedding of rocks. This learns us that in our reference, we have to deal with Sedimentary rocks.
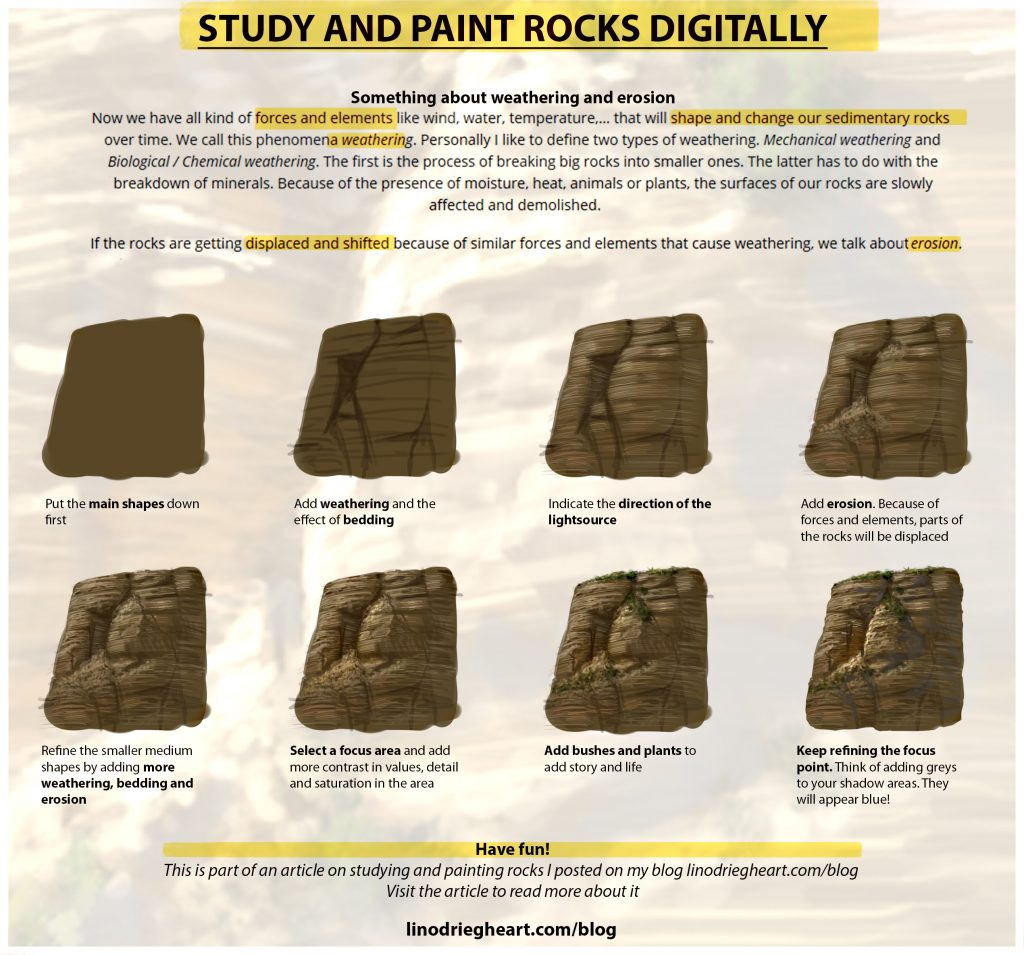
Now we have all kind of forces and elements like wind, water, temperature,… that will shape and change our sedimentary rocks over time. We call this phenomena weathering. Personally I like to define two types of weathering. Mechanical weathering and Biological / Chemical weathering. The first is the process of breaking big rocks into smaller ones. The latter has to do with the breakdown of minerals. Because of the presence of moisture, heat, animals or plants, the surfaces of our rocks are slowly affected and demolished.
If the rocks are getting displaced and shifted because of similar forces and elements that cause weathering, we talk about erosion. In our reference, we have both occurring at the same time.
Let’s get into painting rocks
Once you researched the hell out of your subject you can safely open your painting software and start studying
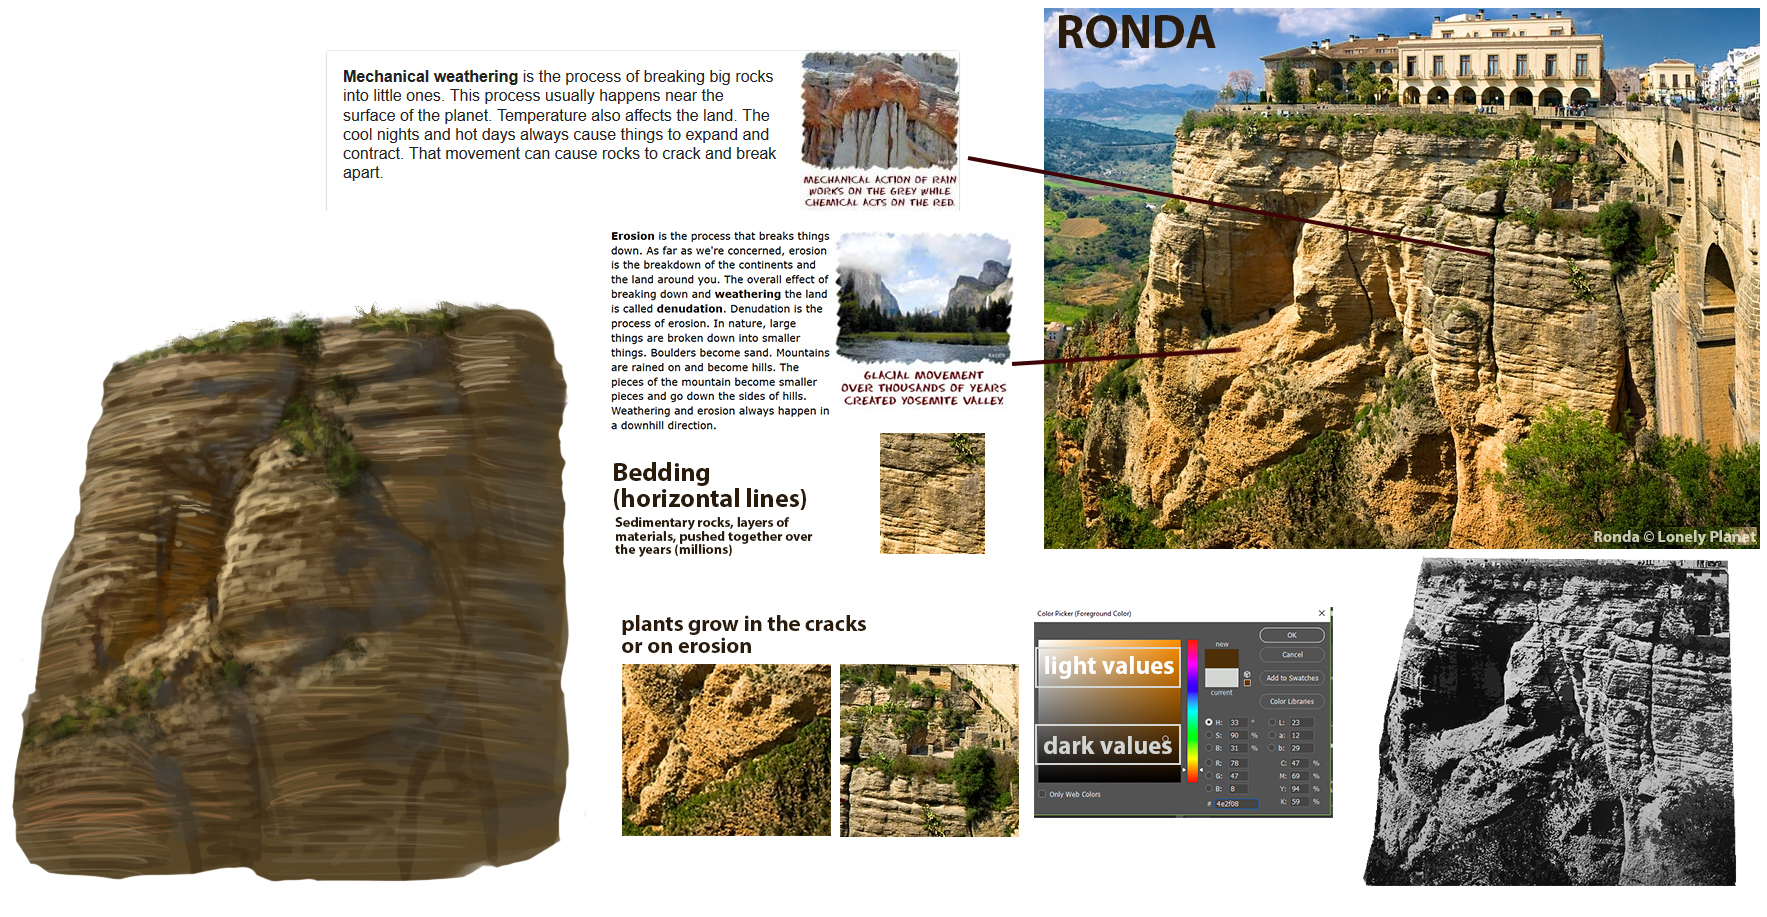
Before defining minor shapes or details, we’ll put the main shape down first. That way we get to overall proportions and size down.
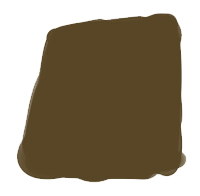
We studied and researched our reference, so we remember that the rock surface is split up because of weathering. Add the effect of bedding as well. Use a darker value to create interesting shapes with contrast in sizes. Read here why contrast in shapes is so important in getting appealing designs.
Indicate the direction of the light source by placing lighter values on the planes that are facing the light. By using a brush with horizontal lines in it, we hint the effect of bedding even more.
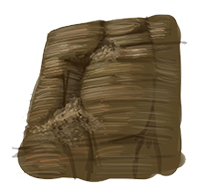
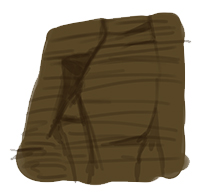
Add erosion. Because of the the wind, water and other kind of forces or elements, parts of the rock will be displaced.

At this stage, you want to start refining the smaller medium shapes that make up the main shape of the rocks. By adding more of the weathering, bedding and erosion you add more form to the medium shapes. Don’t loose yourself in details yet. Squint your eyes and see if the medium shapes are transforming to three-dimensional forms.
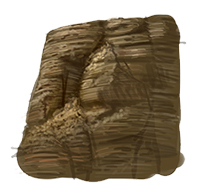
Once the forms are in place, think of your focus point, i.e. the most interesting part. Choosing a focus point does not only help to sell a design or story to the viewer, but it will also withhold you of adding too much detail everywhere and wasting precious time. Time and effort that can be spend on something else instead.
I added more contrast in values, detail and saturation around the focus point.
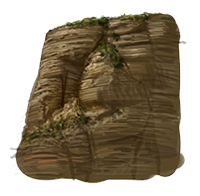
You can add bushes and plants to give the setting more story and life. The vegetation will grow in and around the crevices or eroded and cooler parts of the rocks. Basically where moister could be present.
I like to add a multiply layer underneath to give the vegetation some shadow.
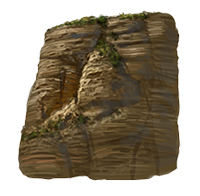
In the final stage you keep refining the focus point. The viewer will likely ignore everything else so don’t over detail areas other than the focus point.
Tip: Think of adding greys in your shadow areas, they will appear blue!
Feel free to download the cheat sheet:
I wrote this tutorial based on my own experiences. Should you have other helpful tutorials or resources on this topic, feel free to share them so everyone can benefit from it.
Let me know if you had a chance to try this technique and if it was any good to you!
Related topics:
Visual Library: Why you can’t live without it
Design Principles in Concept Art and Design
Weekly Challenges group on Facebook
I started daily rock studies after watching Feng Zhu Just Draw wideo. Thanks to your tips I will add some extra thoughts when doing those, like seting focal point. Thanks again 😉