As you may know I’m always searching for new ways to change my work methods and speed. For example, last week I wrote about using the Custom Shape tool and custom shapes in your digital painting. This week I would like to cover the Pattern Stamp tool in Photoshop and how it paint with it.
How it all started
In one of his videos on Gumroad, John J. Park addressed the tool briefly and it triggered my interest. For that reason, I decided to research it more and expanded a little bit further on it.
I quickly realized it’s a great tool to incorporate in your creative process as it generates interesting textures and color variations. Above all, it creates enough room for happy accidents to occur. (Note: with a happy accident I’m referring to the moment while painting something unique and unexpected happens and turns out to be beneficial to your work overall. This can be the placement of texture, light,…)
Pattern Stamp tool in Photoshop
The Pattern Stamp tool (S – Under the Clone Stamp tool) allows you to paint or fill your canvas with a pattern that you choose from your pattern library. Similarly to the Brush tool, you can select a brush tip to paint the pattern with.
Among other, you can also specify following Pattern Stamp tool options:
- Mode: Much like the blending modes in the layer stack, these modes define how the paint that you apply blends with the existing pixels in the image
- Impressionist: Paints the pattern using paint daubs to create an impressionist effect
- Aligned: Repeats the pattern as a contiguous, uniform design. The pattern is aligned from one paint stroke to the next. If Aligned is deselected, the pattern is centred on the pointer each time you stop and resume painting
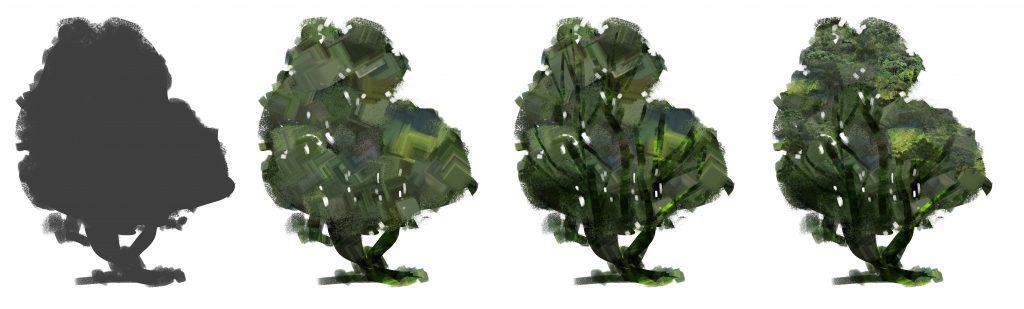
The Pattern Stamp tool applied from left to right: (1) Block in the shape. (2) Impressionist mode to block in the colors. (3) Impressionist mode on overlay to define the shadows. (4) Add detail in the lights by painting with the pattern.
Creating your own patterns
By now you know how the tool allows you to paint with a pattern that you choose from the pattern libraries. So I was thinking: ‘What if I replace the standard patterns with those of forest, fields, clouds,…. Can I find a way to quickly generate some textures and happy accidents?’
Similar to using the Custom Shape tool, you can select a pattern from a library or create your own by going to Edit – Define pattern. Below are some pointers when creating and painting with patterns:
- It is important that the images on your pattern have the same level of detail. You could also make sure they have more or the less same value, but I like to have a mix of different values so there’s a greater chance of having happy accidents
- For your convenience, make the pattern tillable. This will avoid clear divisions when working with multiple images on your pattern. Go to Filter – Other – Offset to do so
- Obvious lines can be blurred out with the content aware tool
- If you think the texture of the pattern is too obvious or harsh, apply a filter to make the it more ‘painterly’ looking. Filter – Noise – Dust & Scratches will do
- Scaling can be necessary when using the patterns on different depths. Scaling the Pattern Stamp tool up or down does not scale the pattern itself!
- Painting over the patterns when not using the impressionist option is needed to avoid over-detailing. You’ll notice that the painting gets too busy if you leave all the details of the pattern
- Start with the impressionist option to block in the layer. Use the detail of the pattern in your lights or shadows only
- It can be interesting to start painting outside your shape first, because the Pattern Stamp tools is centred on your pointer each time you start painting
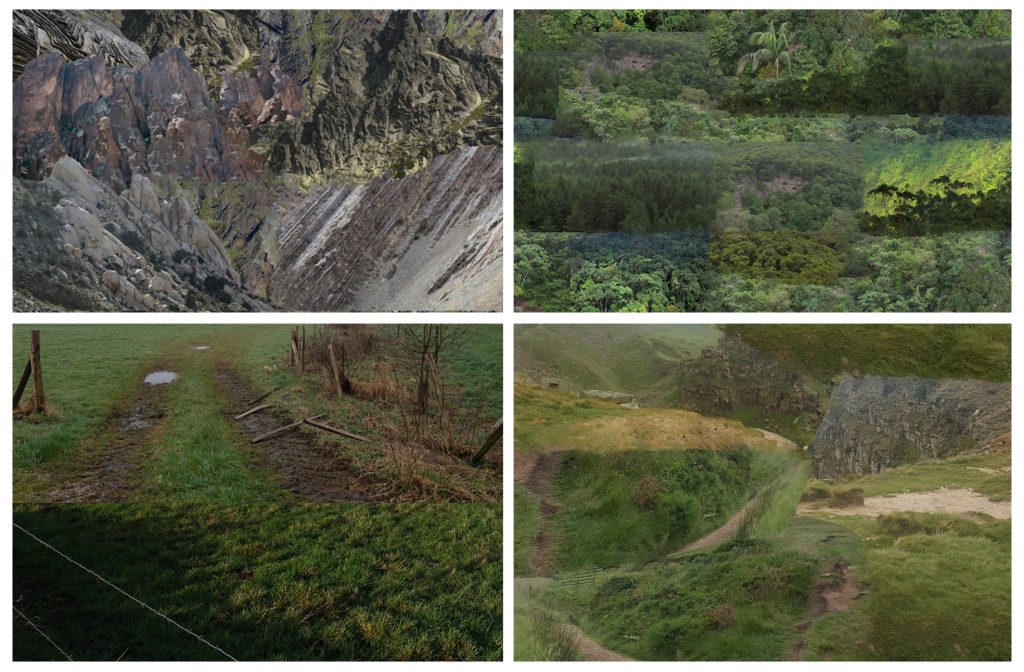
These are example patterns I used in the featured image on top of this post: from left to right, top to bottom: (1) rock pattern, (2) tree pattern, (3) grass up-close pattern,(4) grass mid-ground pattern
How to apply to your digital paintings
When working on a project, it is always recommended to downscale the project in smaller tasks. That way you can fully focus on the task in hand.
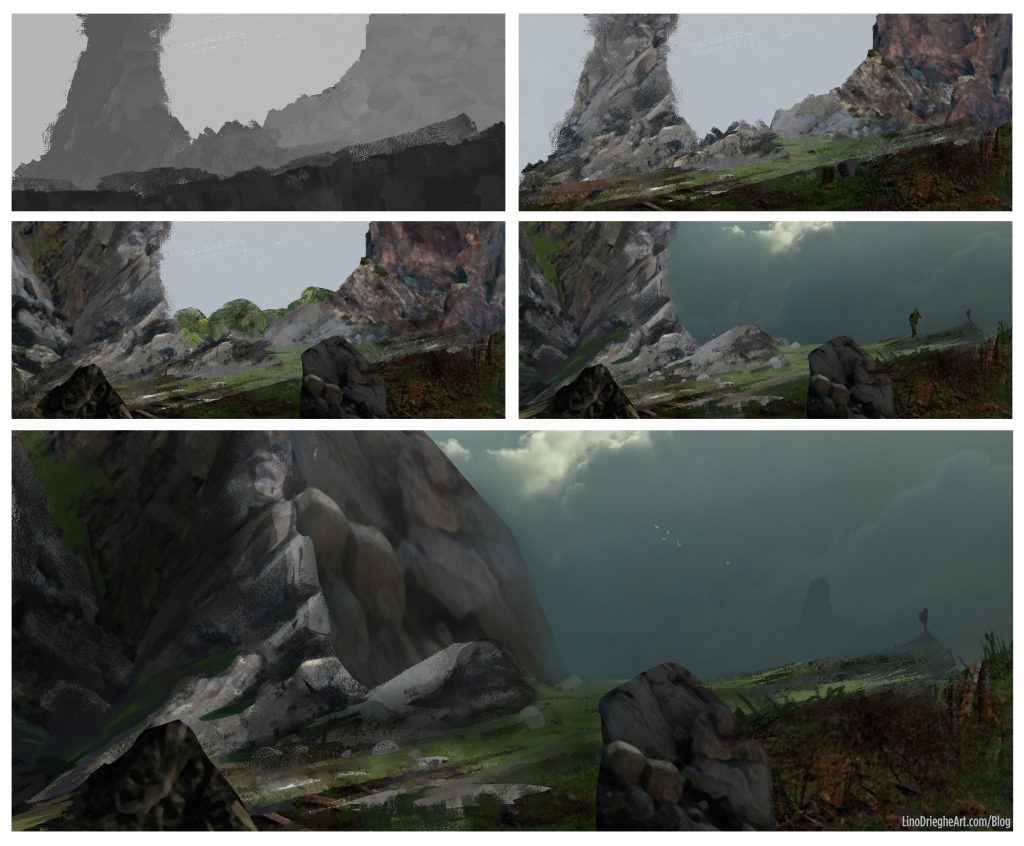
In the case of this environment piece, first of all, I wanted to start with creating a clear value range as it is one of the more important aspects while painting. That, among having a strong composition. I started in greyscale first, so I could solely concentrate on the values.
I also made sure I’m creating a new layer, every time I create a new ground. By doing so, I can use these layers as a base for clipping masks.
Once the values are set, it is time to add some color and texture to the environment. Because the grounds are on separate layers, I’m able to create clipping masks which I use to paint with the Pattern Stamp tool. In combination with the Impressionist mode, I’m able to quickly generate some textures and hopefully some happy accidents. You’ll notice though that the filled layer won’t correspond with the value underneath, so some adjusting is needed with Levels (CTRL+L).
With the lasso tool, new shapes and forms can be created while I keep the overall value range in check. In this stage, most of the colors and textures are set, so switching to the Brush tool is advised to avoid over-detailing the painting.
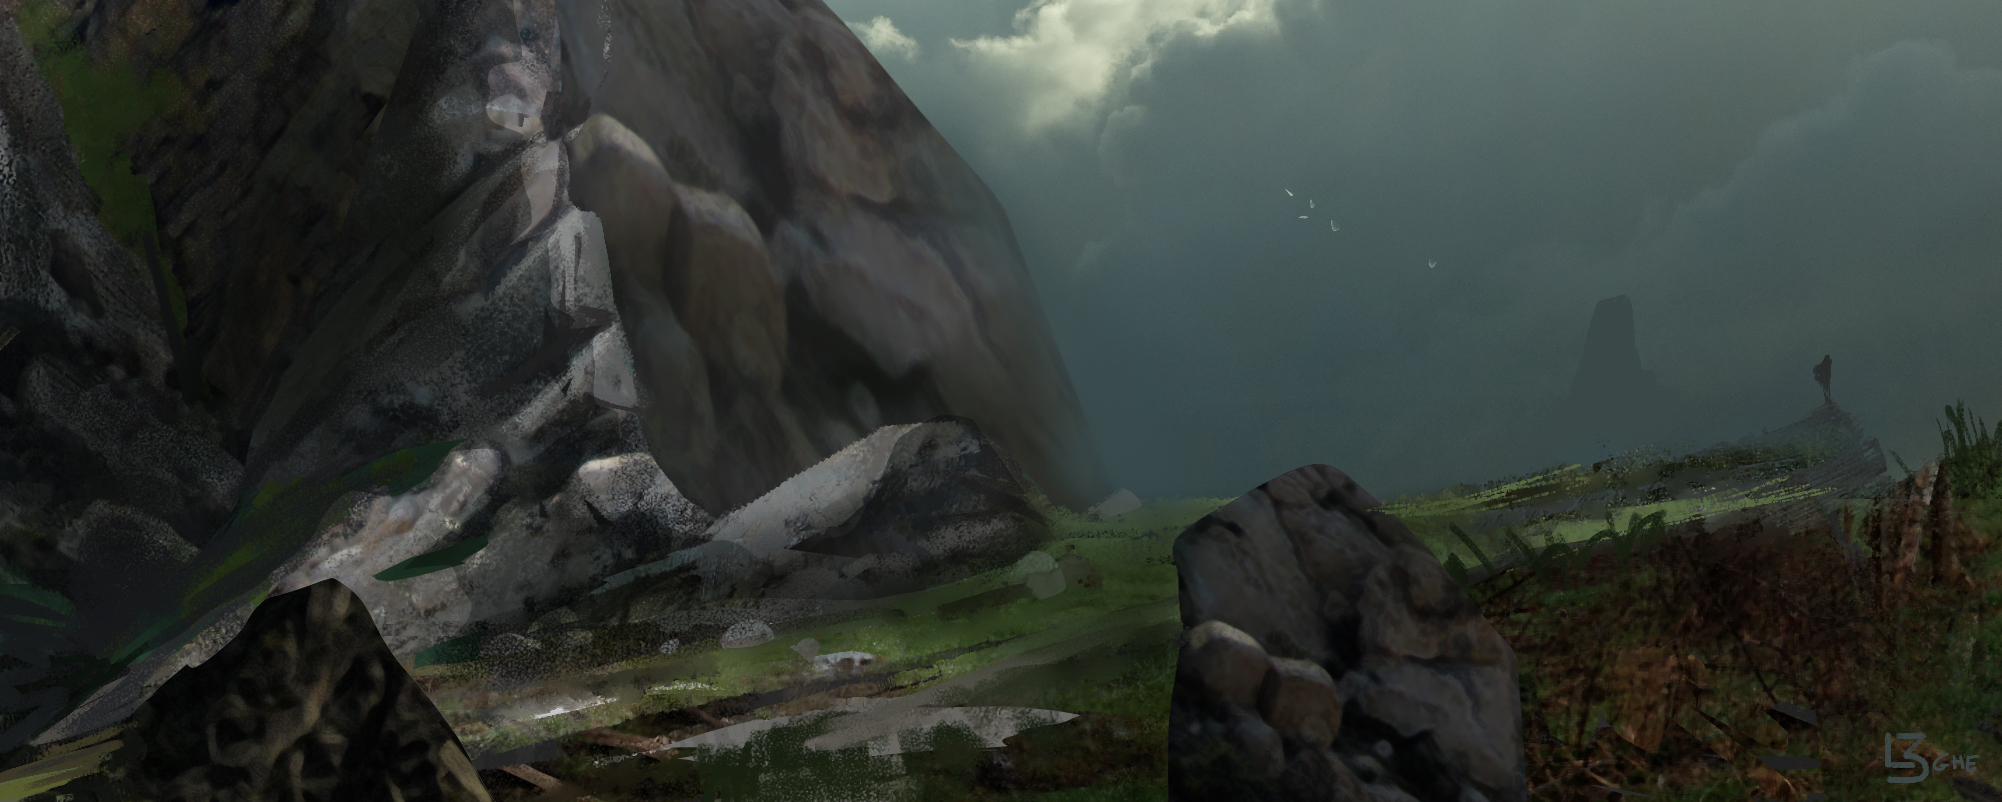
Happy accidents can occur in every stage of the painting which this final step demonstrates nicely. By wrongly placing the image of the sky between two layers, I ended up with a composition I liked much more then the intended one.
Conclusion
The Pattern Stamp tool can be a great addition if you’re looking for a new method to include in your beginning stages of your creative works. First of all, it generates clear textures and interesting color variations. Furthermore, because the placement of the pattern can be different each time you paint, there is more chance of landing happy accidents.
To get you started you can download some of my patterns and try them out yourself. Let me know if this technique is of any good to you and if you would consider integrating it in your workflow. Good luck!