Hello everyone,
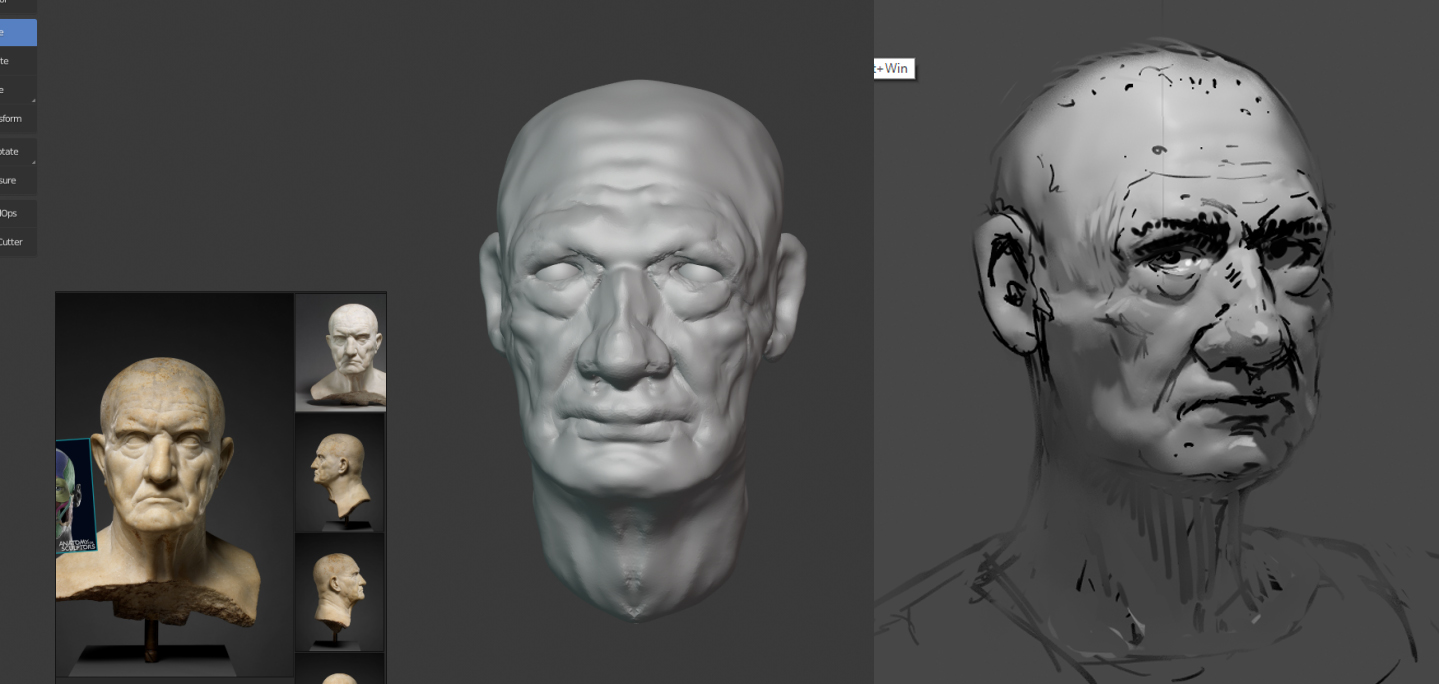
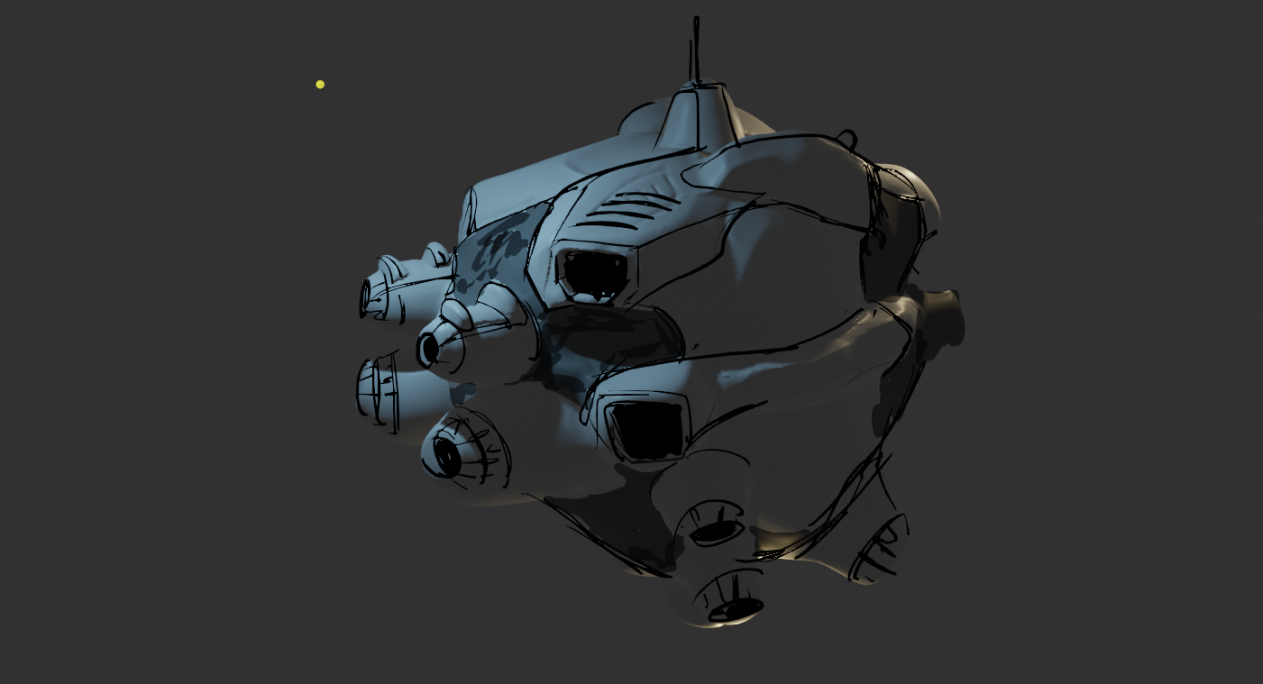
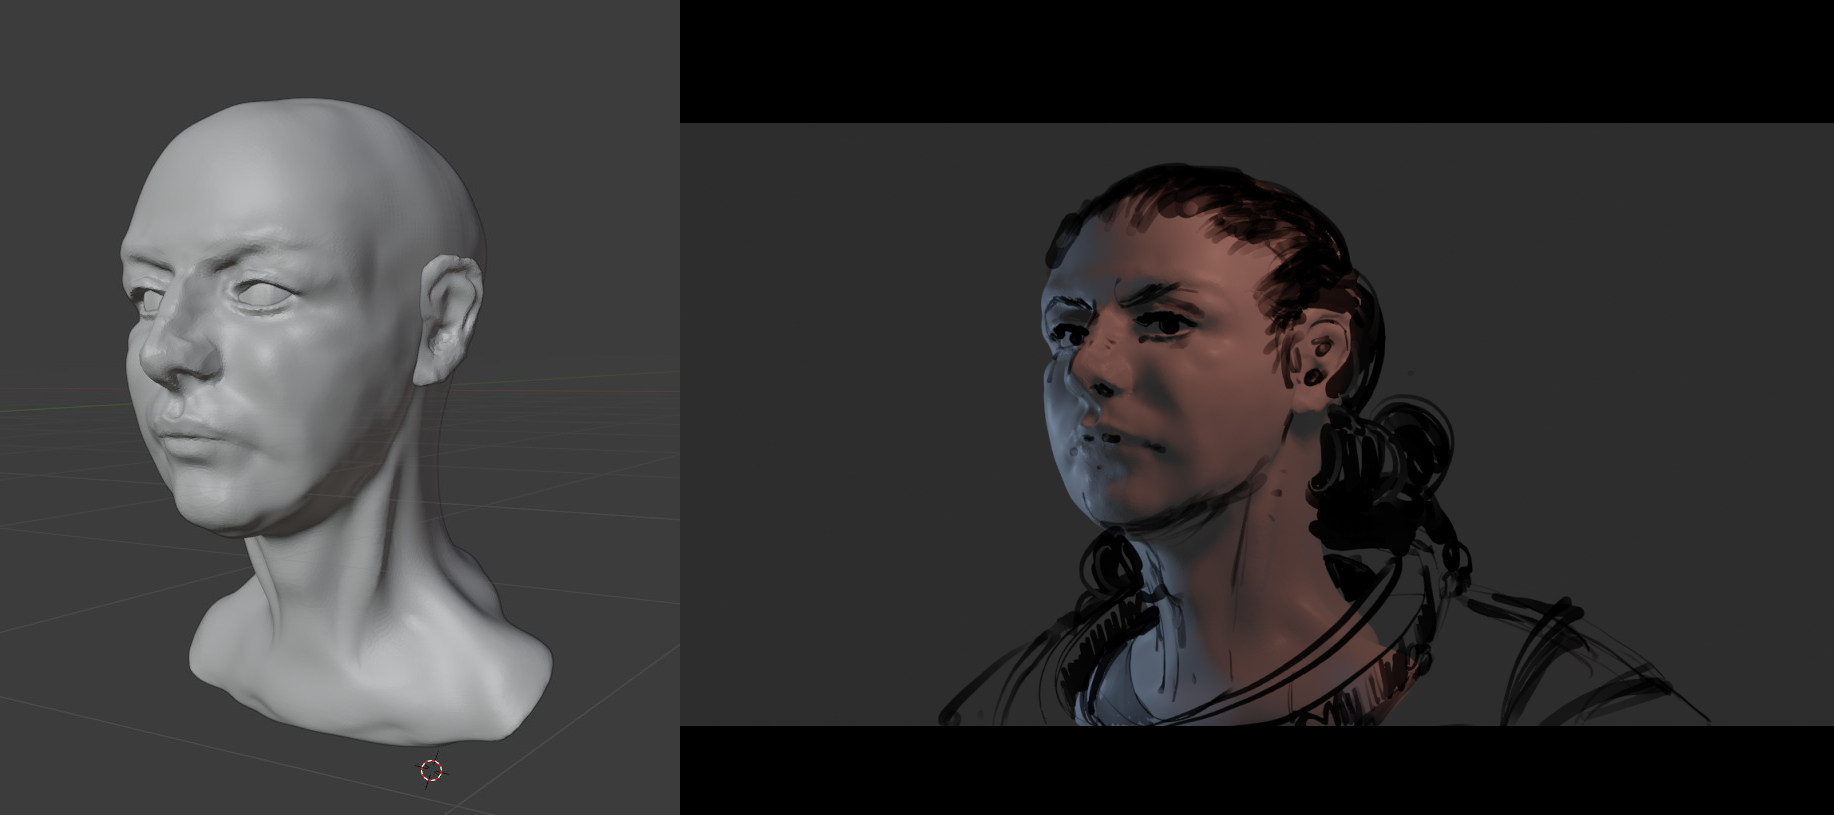
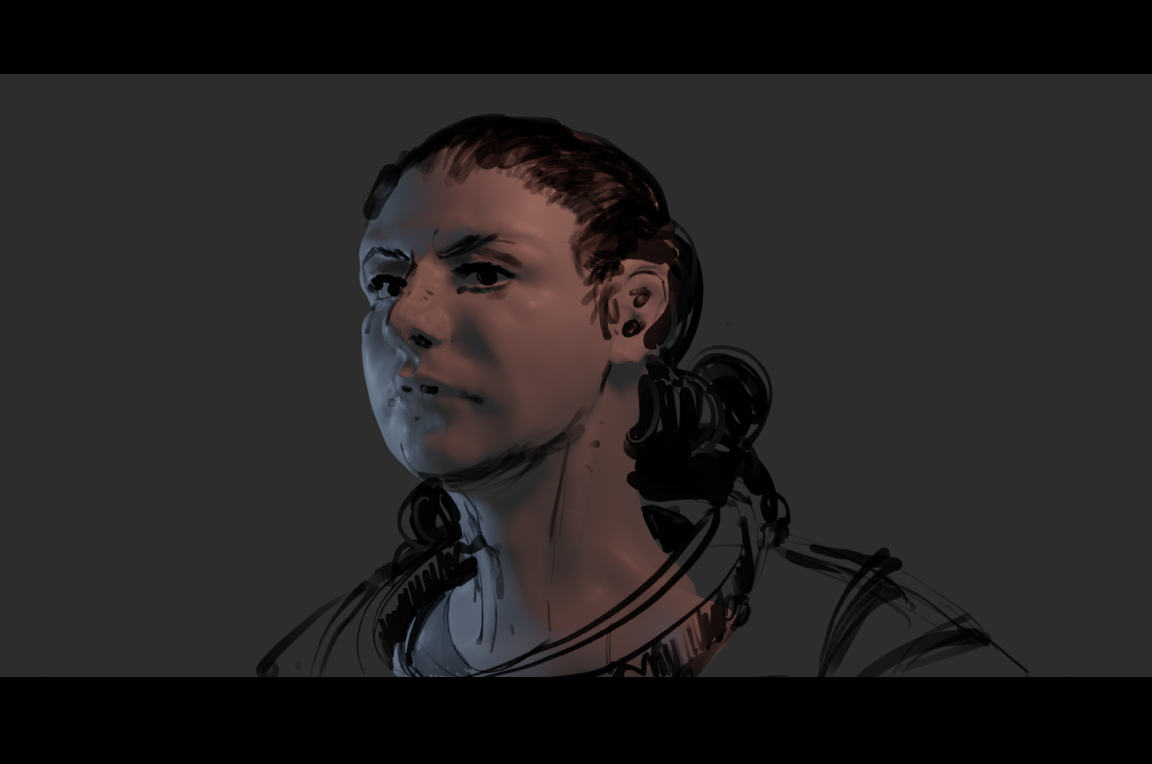
After the post of last week, my friend and collegue Oskar Kuijken directed me to this Youtube video of Marco Bucci. The video explains how you can create character designs viewed and lit from any angle in Blender. I was amazed how quickly you can make iterations using this workflow. That’s why I dived right into it.
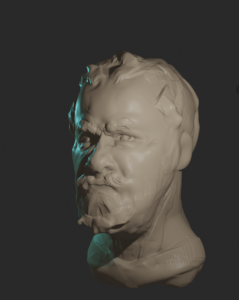
In short, you start with a sculpt of a head / object / … and use Blender’s grease pencil to draw on top of the sculpt. I’m not that familiar with sculpting, I did some Zbrush here and there, so this week I explored the sculpting options within Blender.
Things started quite rough for me, but I’m happy I pulled through. I have the feeling in the end the sculpting will also help me improving my 2d faces.
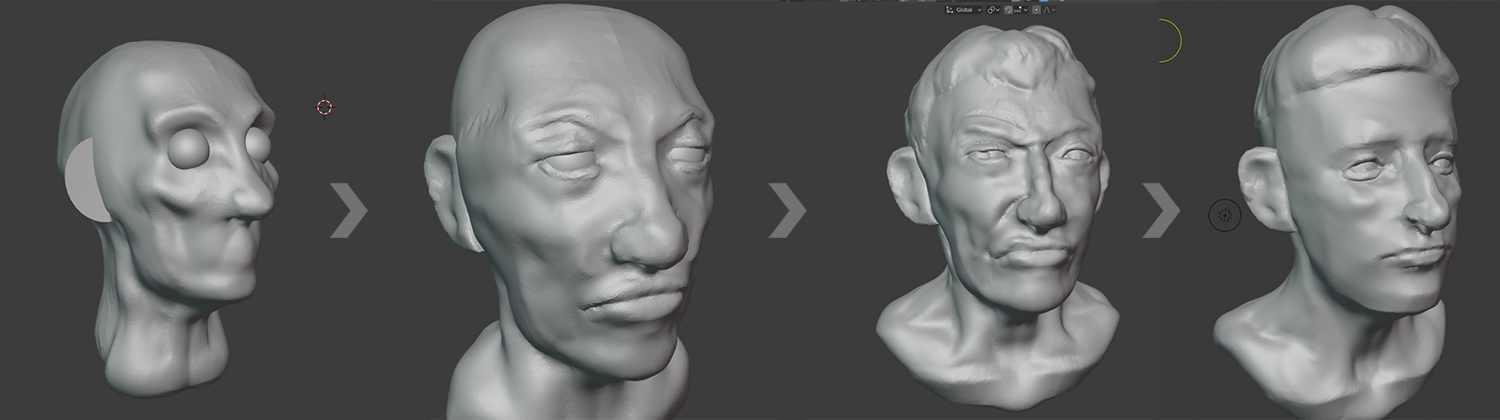
I use following brushes when sculpting:
- Grab & Snake Hook: Good to reshape your base mesh
- Flatten & Scrape: Good to put more structure in the faces by sculpting the planes of the head
- Clay Strips: Ideal to lay down extra ‘clay’ on the sculpt
- Crease & Pinch: Good in the detail phase, to put wrinkels and clear transitions of volumes
Do try it out! And of course, like always, feel free to share any work, commments, questions!